
Getting started
Getting started with Localizethat
You can localize something real in a couple of minutes. Brand Context and Market Context make the result better, but nothing has to be set up first.
The workflow
Every project follows the same six steps.
- 01CREATE
Start a project and add the content you want to localize.
- 02CONTENT BRIEF
Describe the audience, placement and objective for this content.
- 03CHOOSE MARKETS
Pick the markets you're localizing for and how each one should be approved.
- 04LOCALIZE
Localizethat applies Brand Context, your content brief and Market Context for each market.
- 05REVIEW & APPROVE
Review content per market yourself, or assign the active reviewer for that market.
- 06DELIVER
Export the approved content, or save it where your team works.
1. Create a project and add content
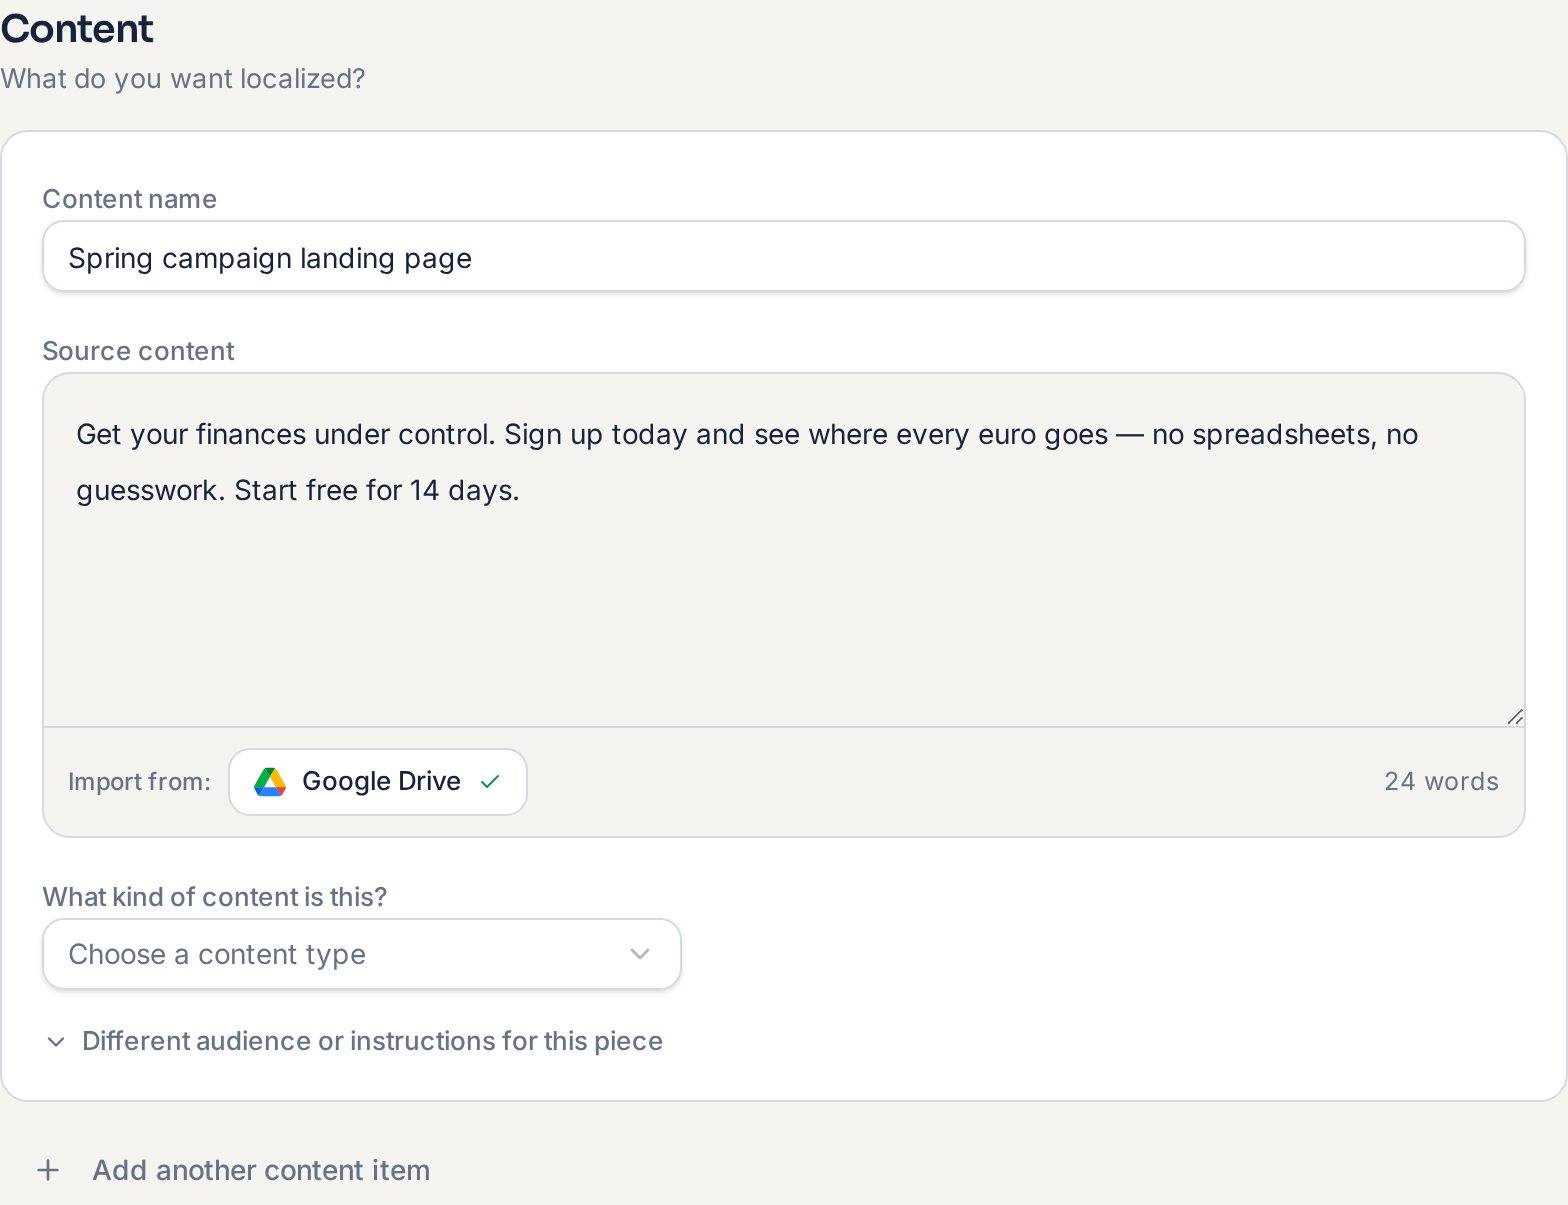
Select New project under Projects, then paste your text or import a Google Doc, .txt or .md file from Google Drive. Name the content, choose the content type, and add another content item if the project covers more than one piece.
2. Write a content brief
A short content brief tells Localizethat what this specific piece of content is for: the audience, where it will appear, the objective, and any instructions or constraints that only apply here. It works alongside your reusable Brand Context and Market Context — it doesn't replace them.
3. Choose markets and localize
Search for the markets you need and add as many as you want — Germany — German and Austria — German are separate markets. For each one, choose an approval path: review it yourself or assign the one active reviewer for that market.
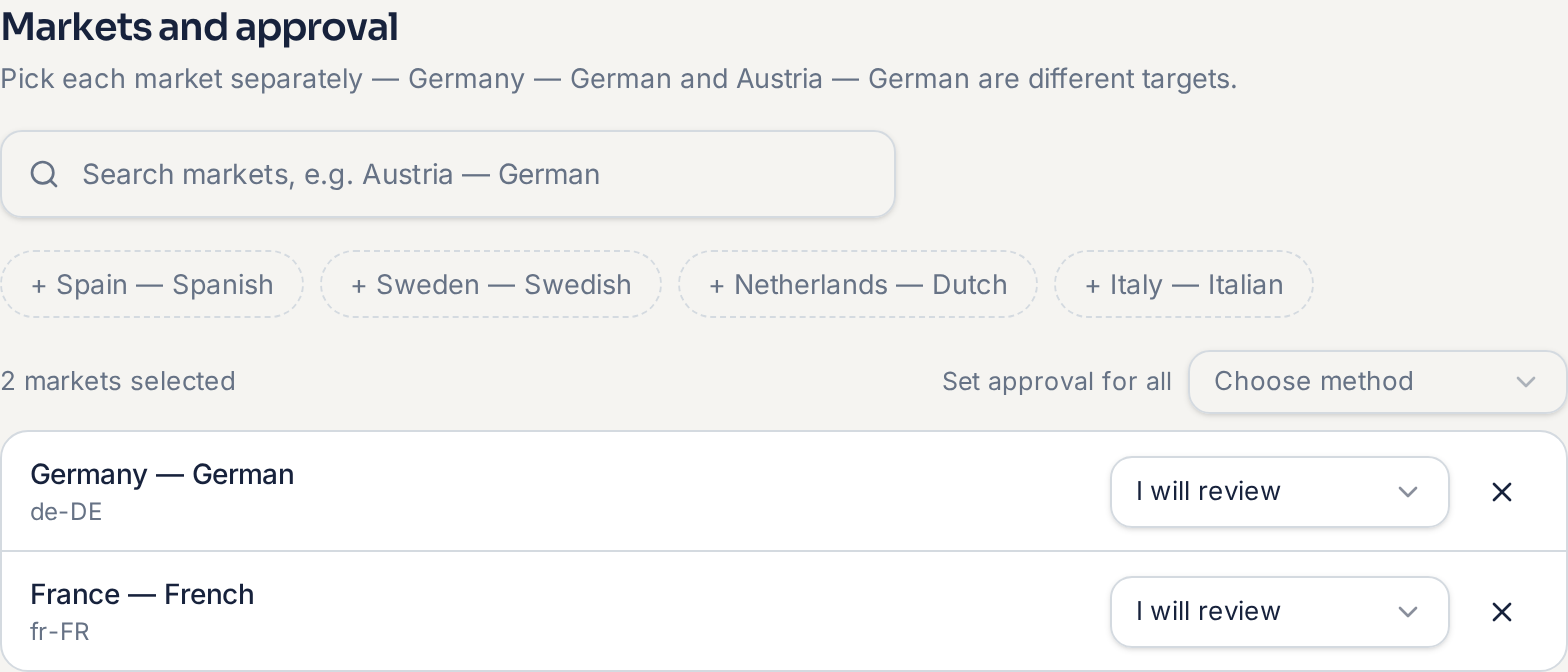
Relevant Brand Context and Market Context — brand voice, terminology, approved claims and market rules — is applied automatically, alongside your content brief.
4. Review and approve
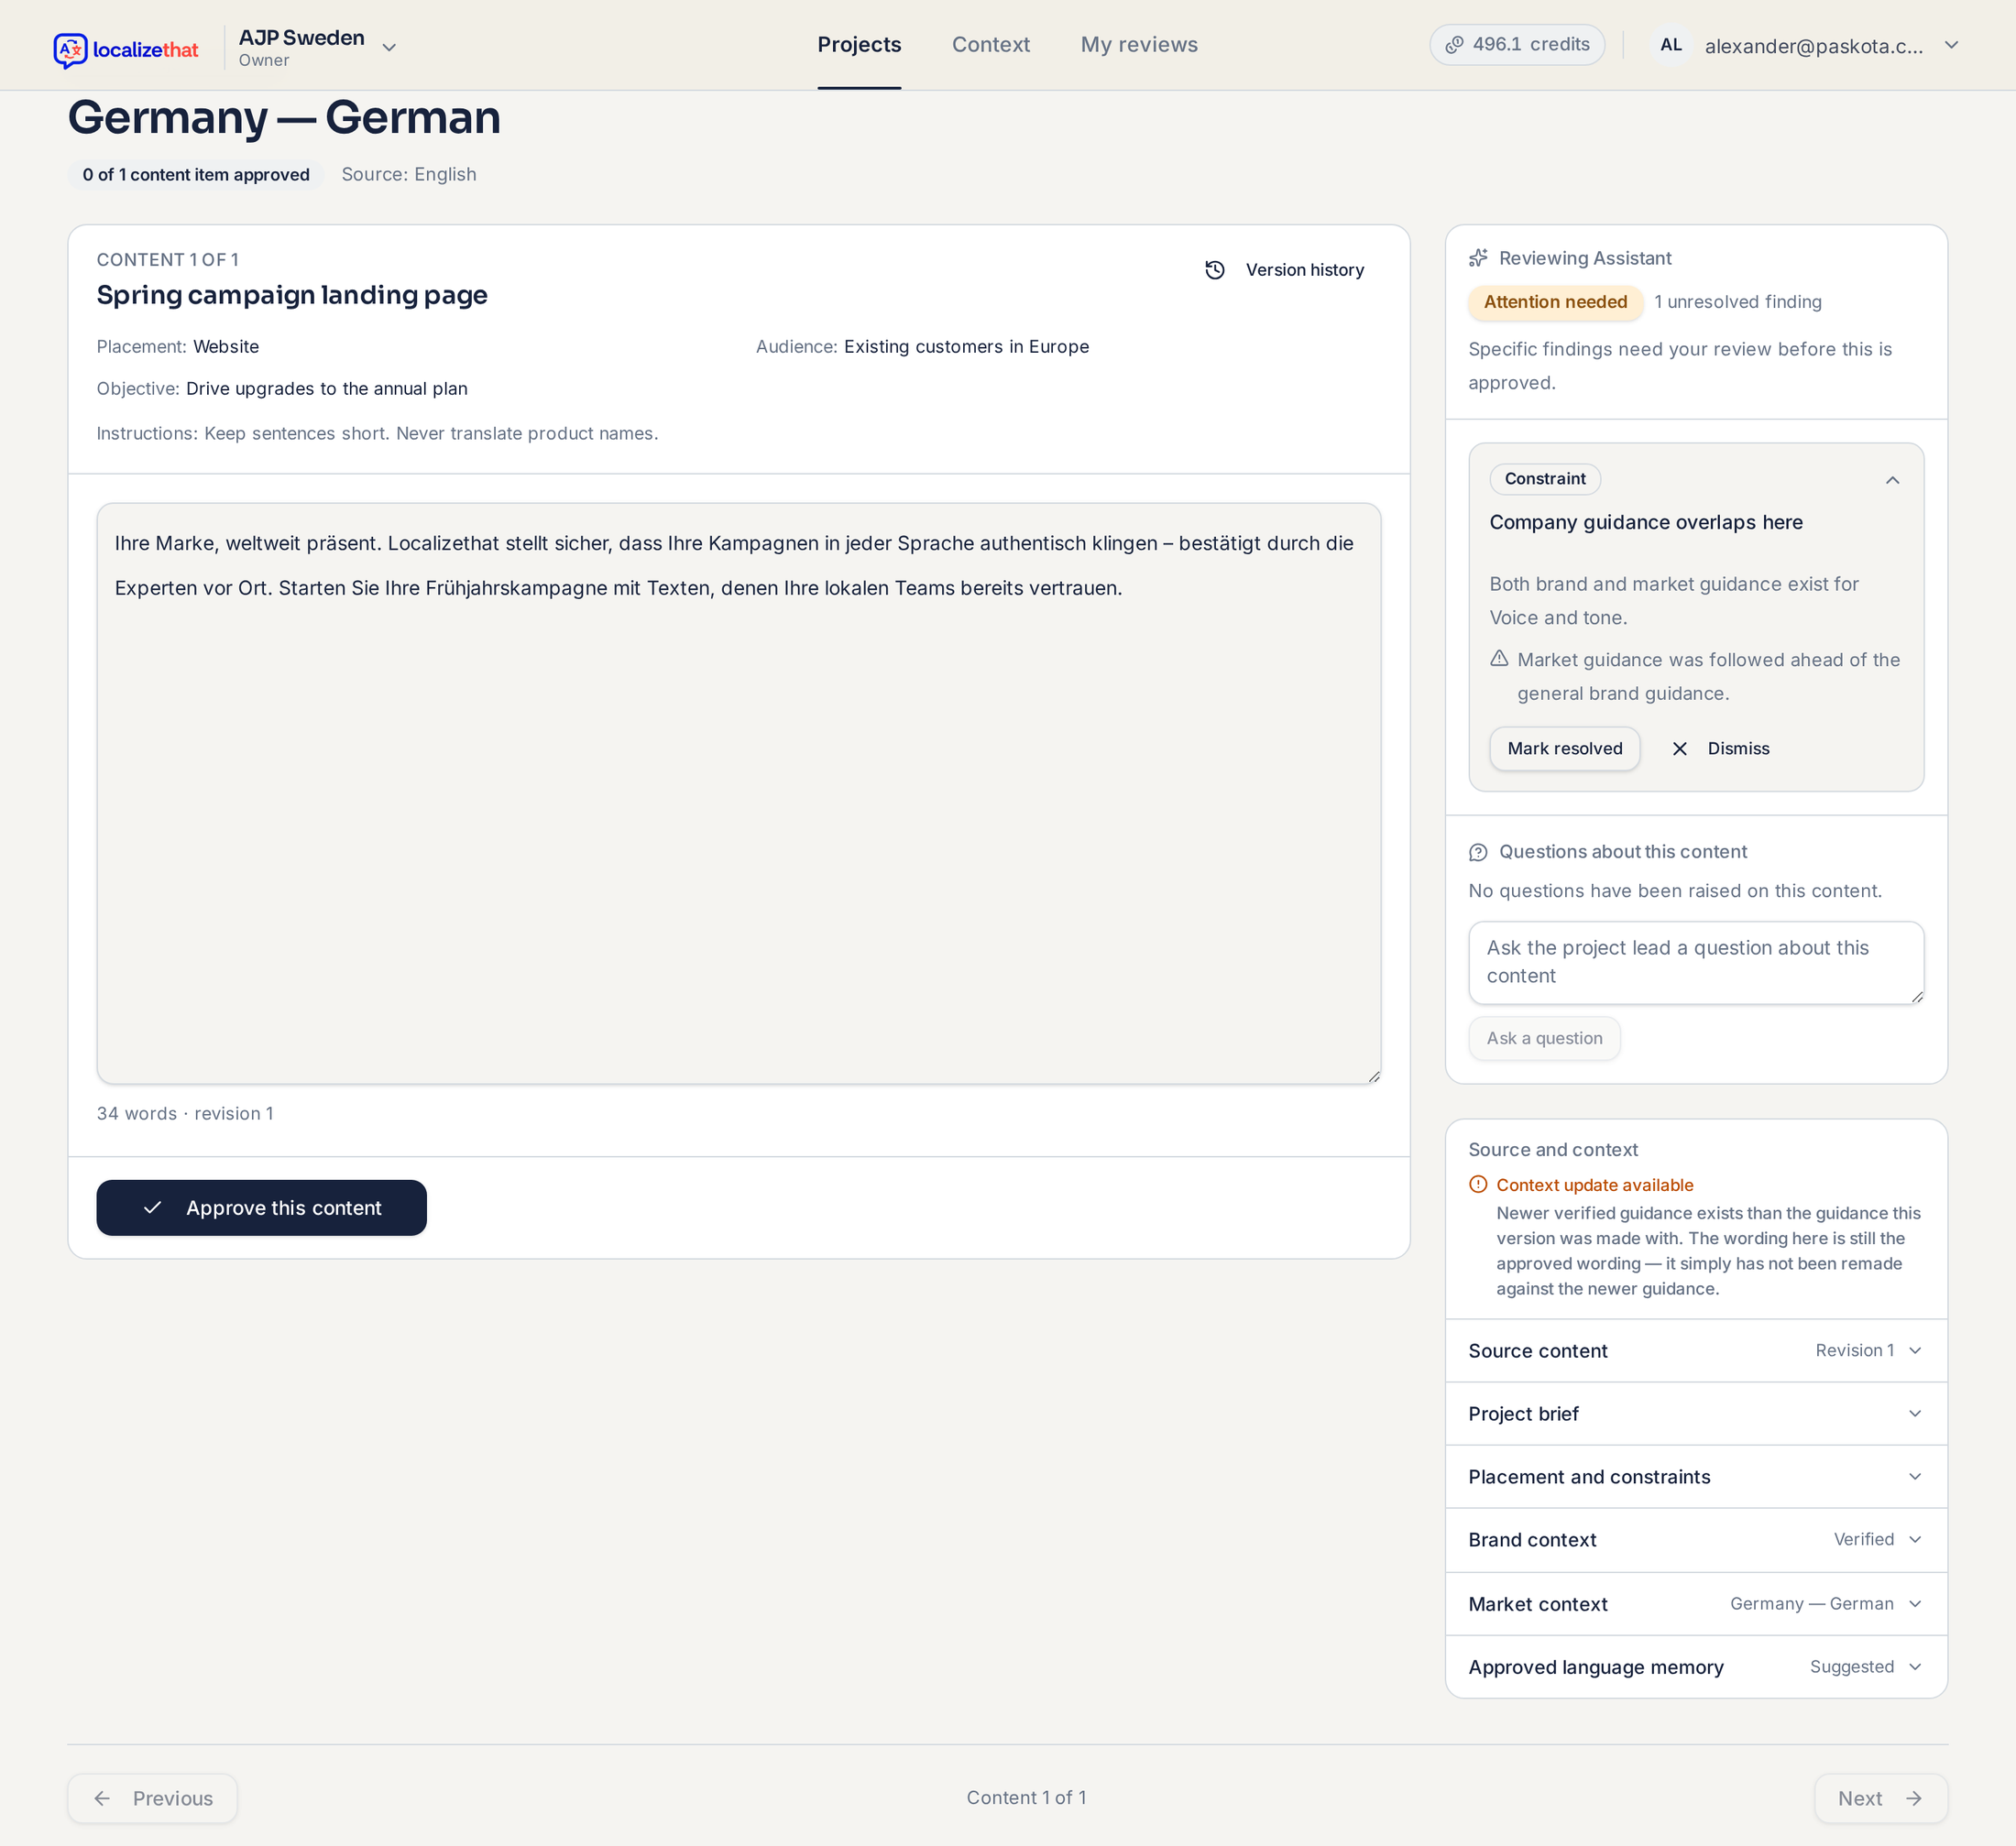
Each market is reviewed on its own, with one active reviewer per market. The Reviewing Assistant flags what deserves a look — no issues found, attention needed, or local judgment recommended — and approval happens per content item in that market.
5. Deliver
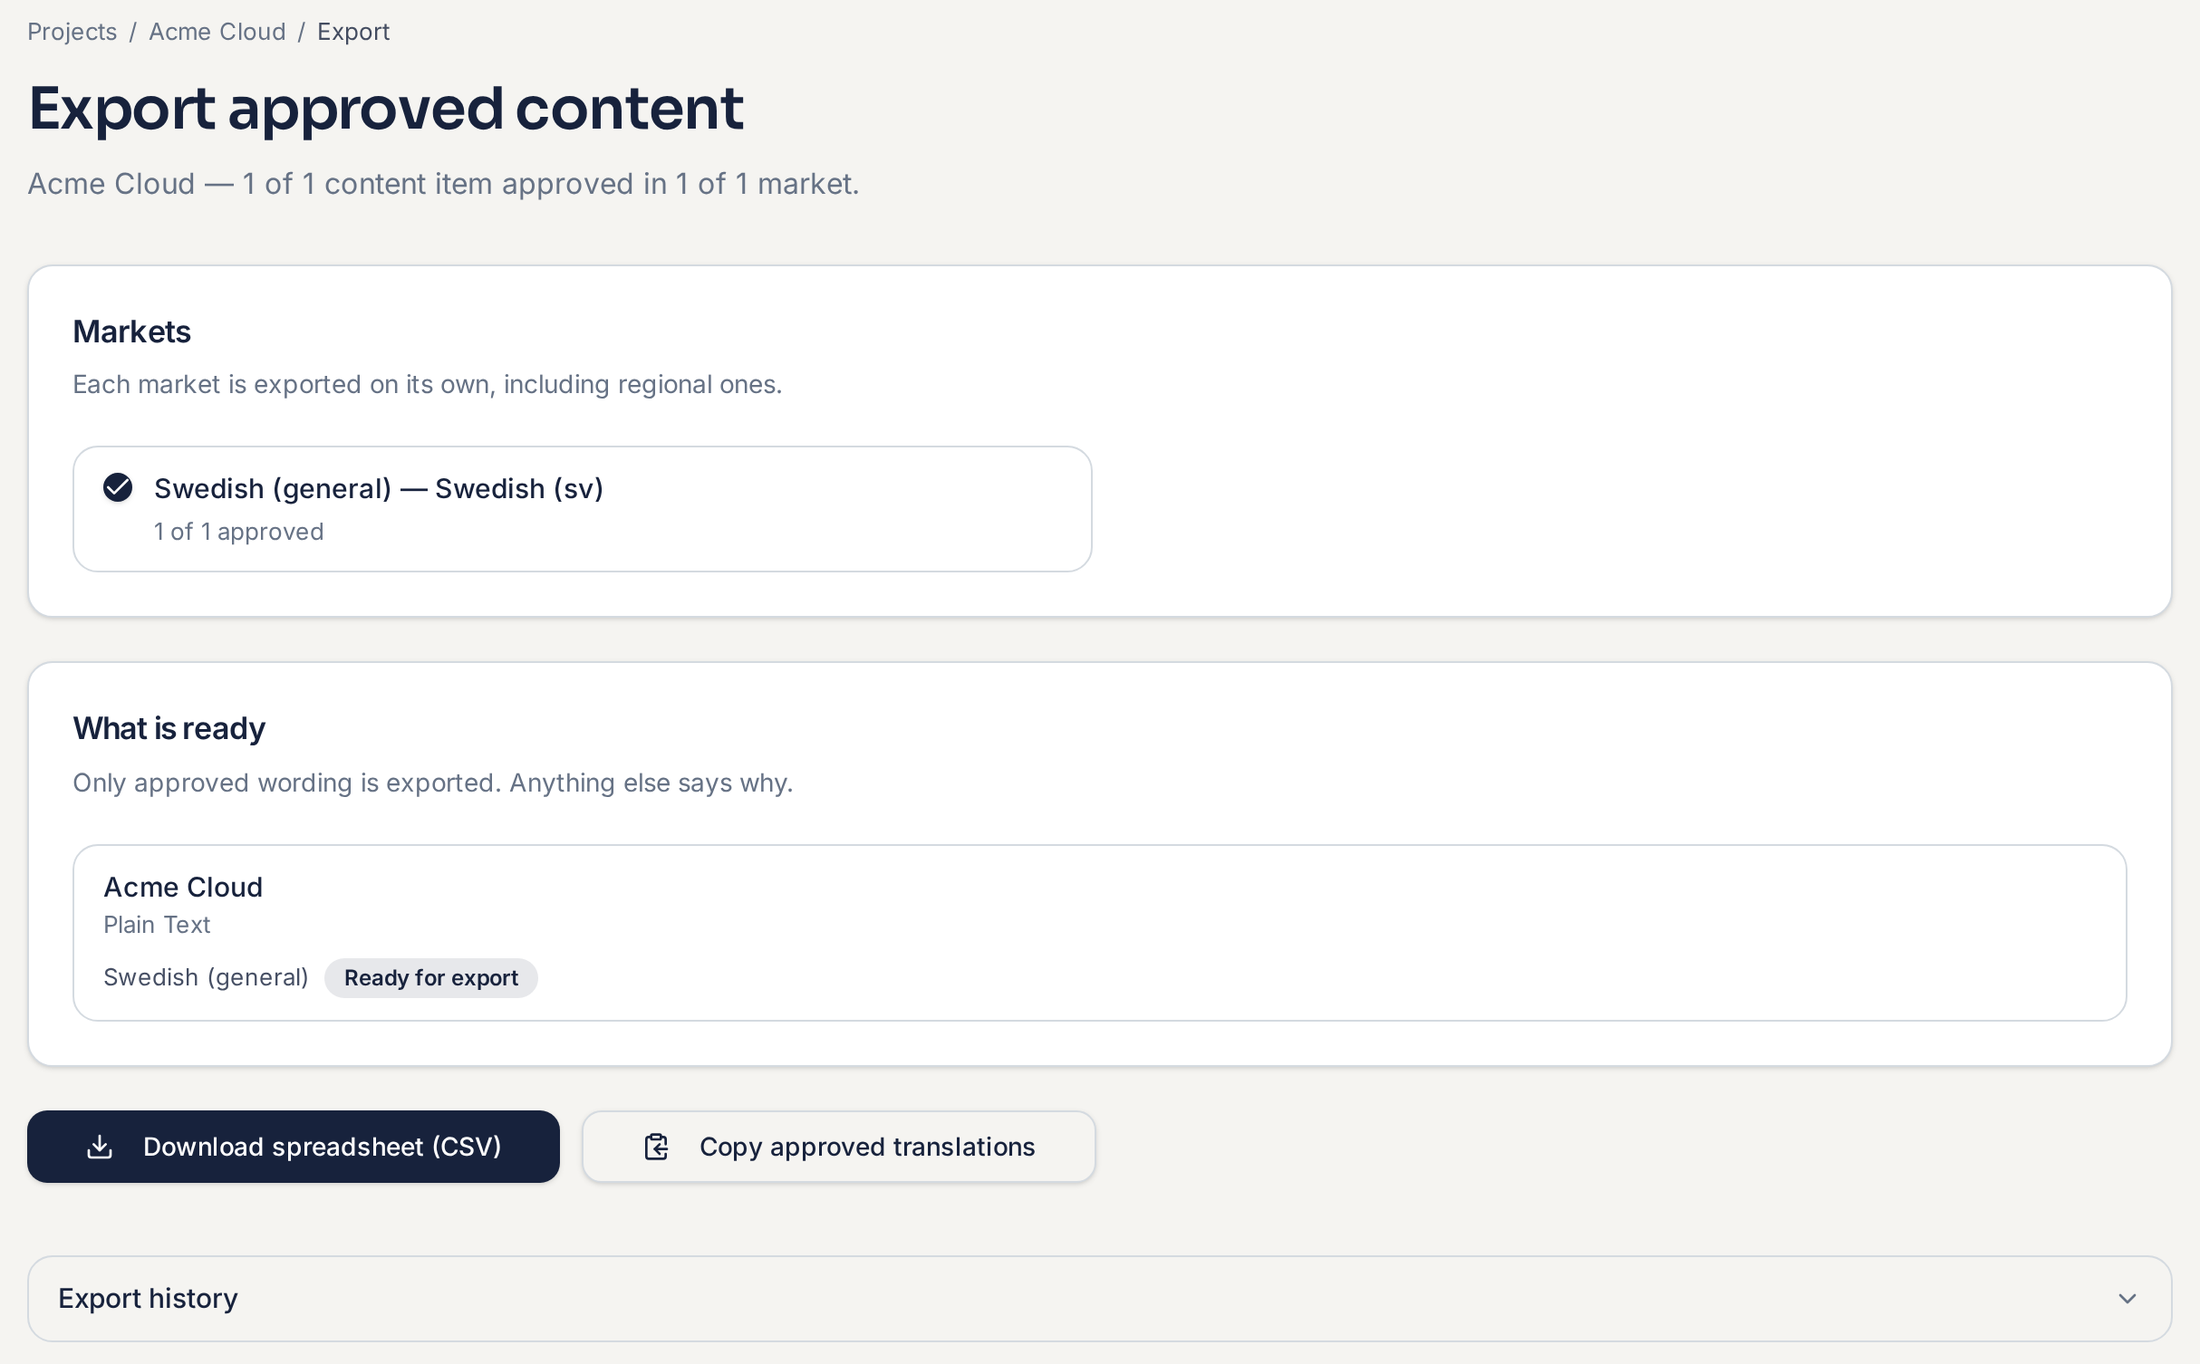
Once content is approved in a market, export it. Only approved wording is exported, and each market is exported on its own.
What it costs
1 credit = €1 = 1,000 source words localized into one market. Every new workspace starts with 10 free credits, and text reused from your approved Translation Memory costs 20% of the normal rate.
Ready for your first localization?
Related guides
Create your first localization
The content brief and market setup, screen by screen.
Set up Brand Context and Market Context
The reusable knowledge Localizethat localizes from.
Review and approve
Work through content per market and approve it.
Credits and usage
1 credit = €1 = 1,000 source words into one market.