
Getting started
Create your first localization
A new project is one screen: add the content, write the brief once, and choose the markets it goes into. Then localize and review each market on its own.
Step 1 — Add content
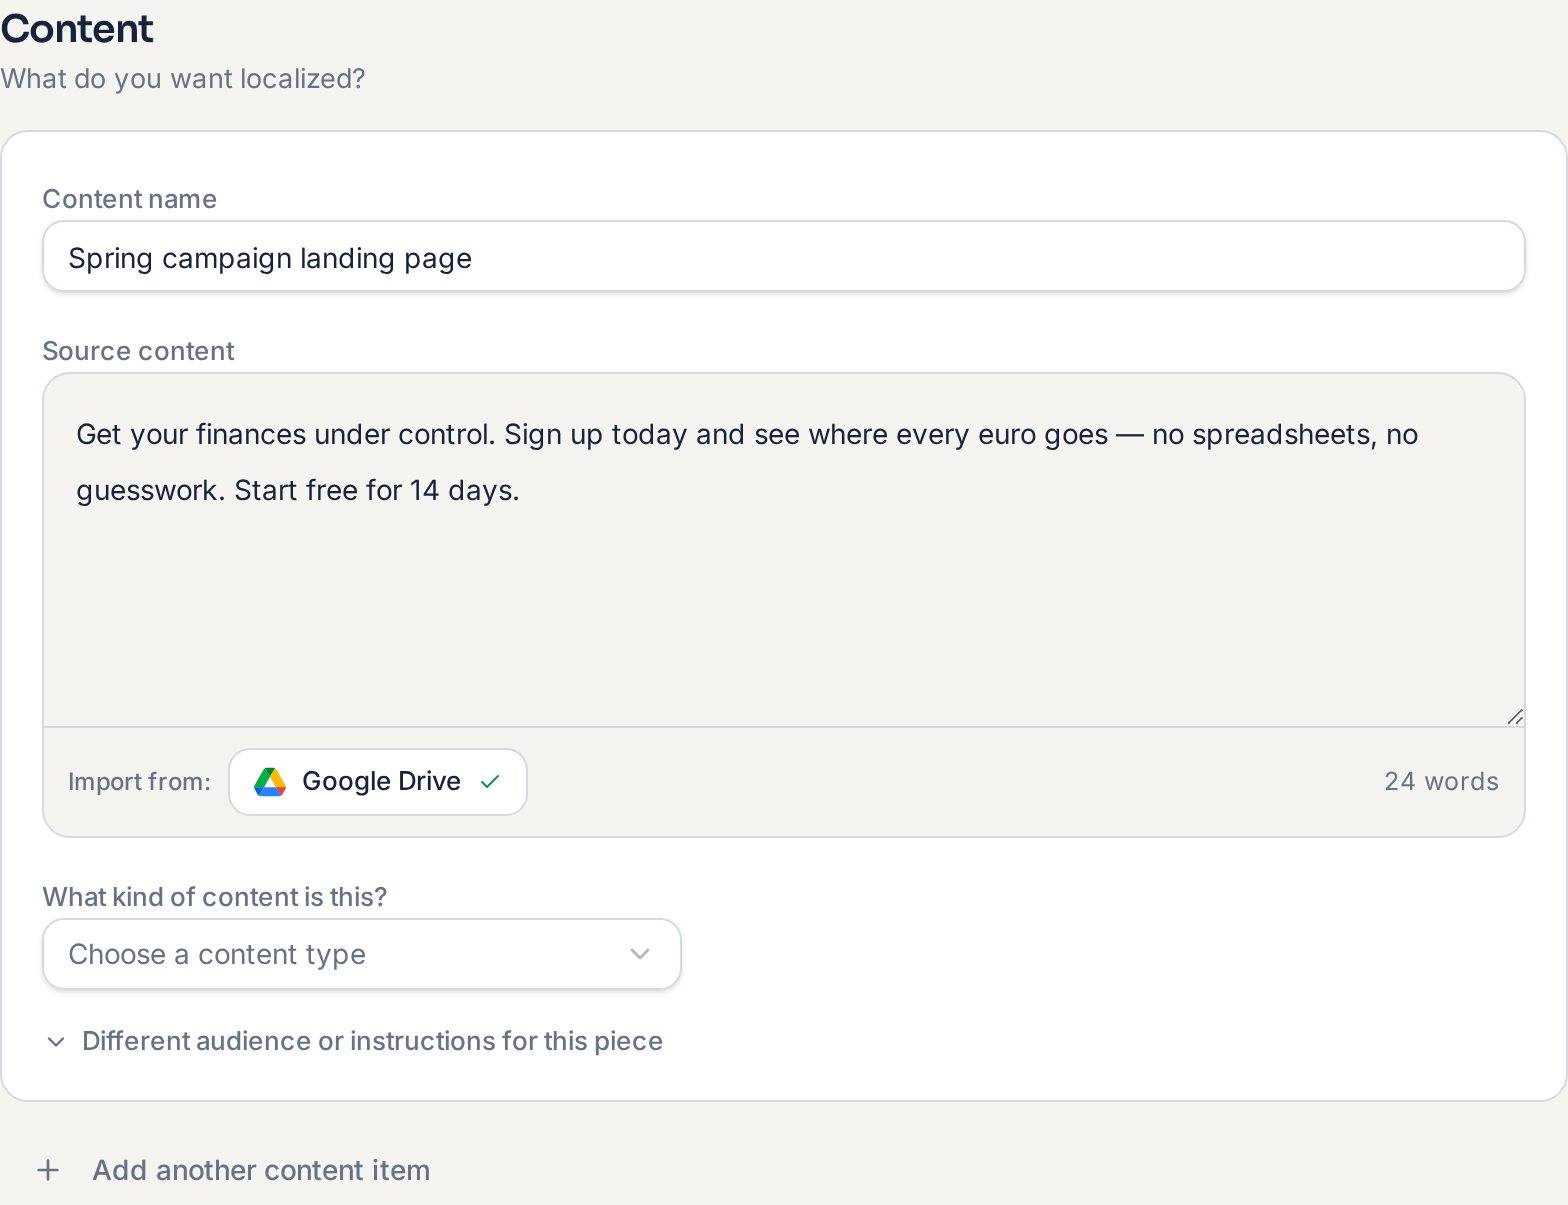
Paste your source text, or select Google Drive to import a Google Doc, .txt or .md file. Name the content, choose the content type, and add another content item if this project covers more than one piece.
Step 2 — Write the content brief
The brief covers the whole project: source language, audience, objective and any instructions. Every content item follows it unless you gave that item its own instructions. It works alongside your reusable Brand Context and Market Context — it does not replace them.
Step 3 — Choose markets and approval
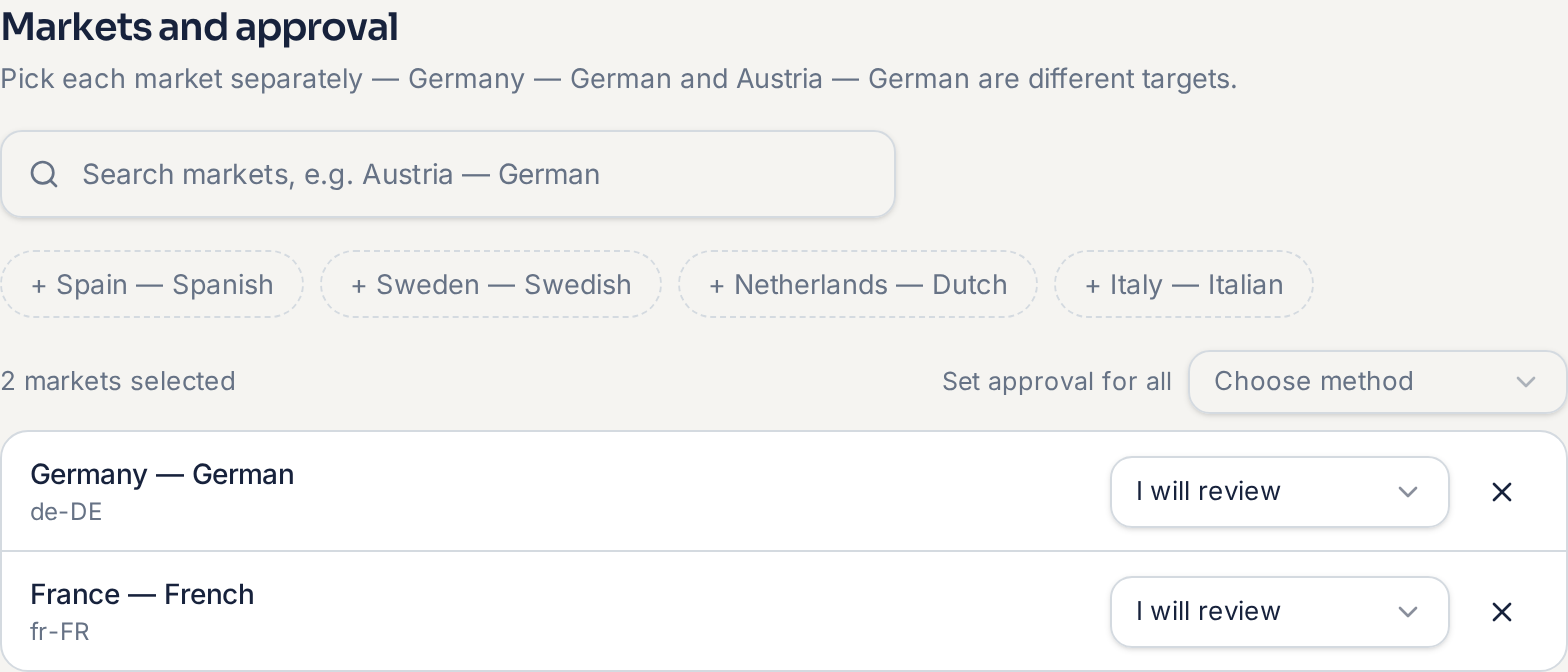
Pick each market separately — Germany — German and Austria — German are different targets. Set an approval path per market: review it yourself, or assign the one active reviewer for that market. Then select Create project.
Step 4 — Localize
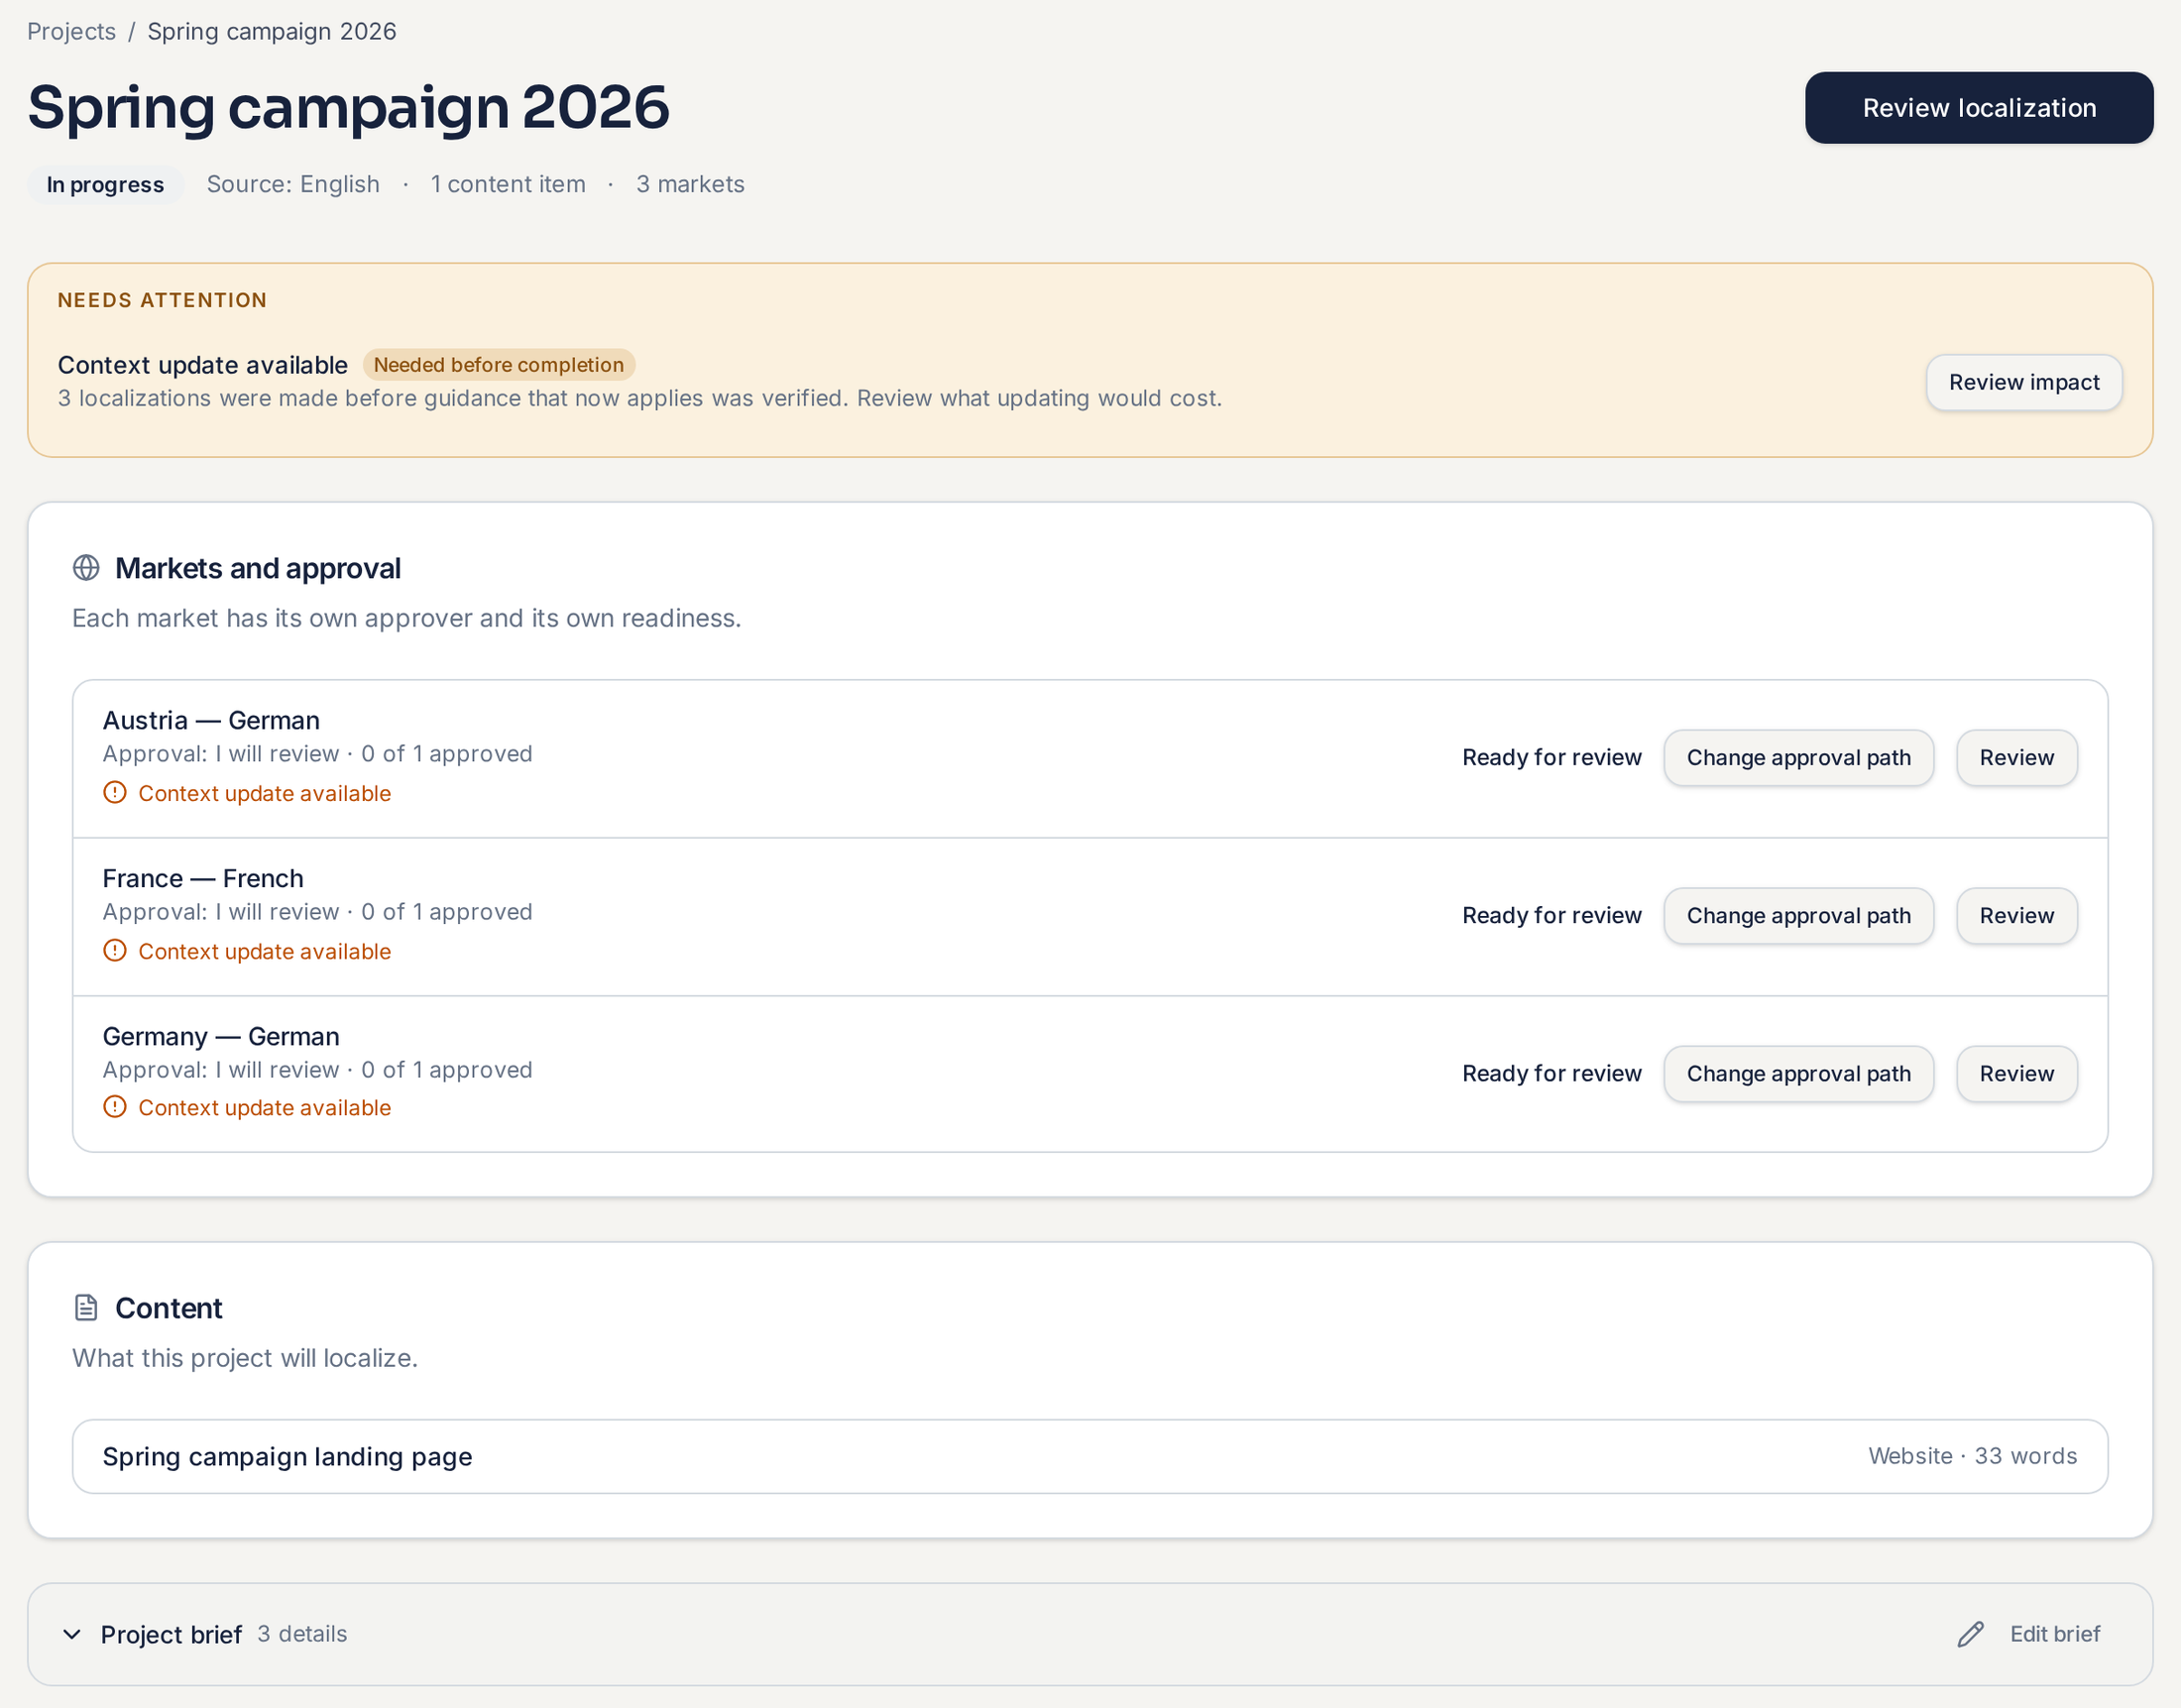
The project overview shows the markets, their readiness and the content in the project. Start the localization from here, then move into review for each market as it becomes ready.
What happens next
The project moves through Review per market and then Deliver & export. You can leave and come back — an unfinished project stays in your list.
Related guides